
For students who have access to the lab. This means that a member of the lab staff has:
- Added your name and reason to the lab access list, which is digitally available to the Delta administrator.
- Handed you a physical access card.
- Given you edit access to the lab’s Google Calendar.
- Included your e-mail in the lab’s e-mail list.
You can check your access by going to: https://cglearn.eu/cgvr.
Table of Guides
- General Lab Guide
- The Plan
- Wireless Vive Guide
- 3D Printing Guide
- Games Guide
- Remote Desktop Guide
- Network Drive Guide
- Microphone Guide
General Lab Guide
Here are the guidelines for using the lab:
-
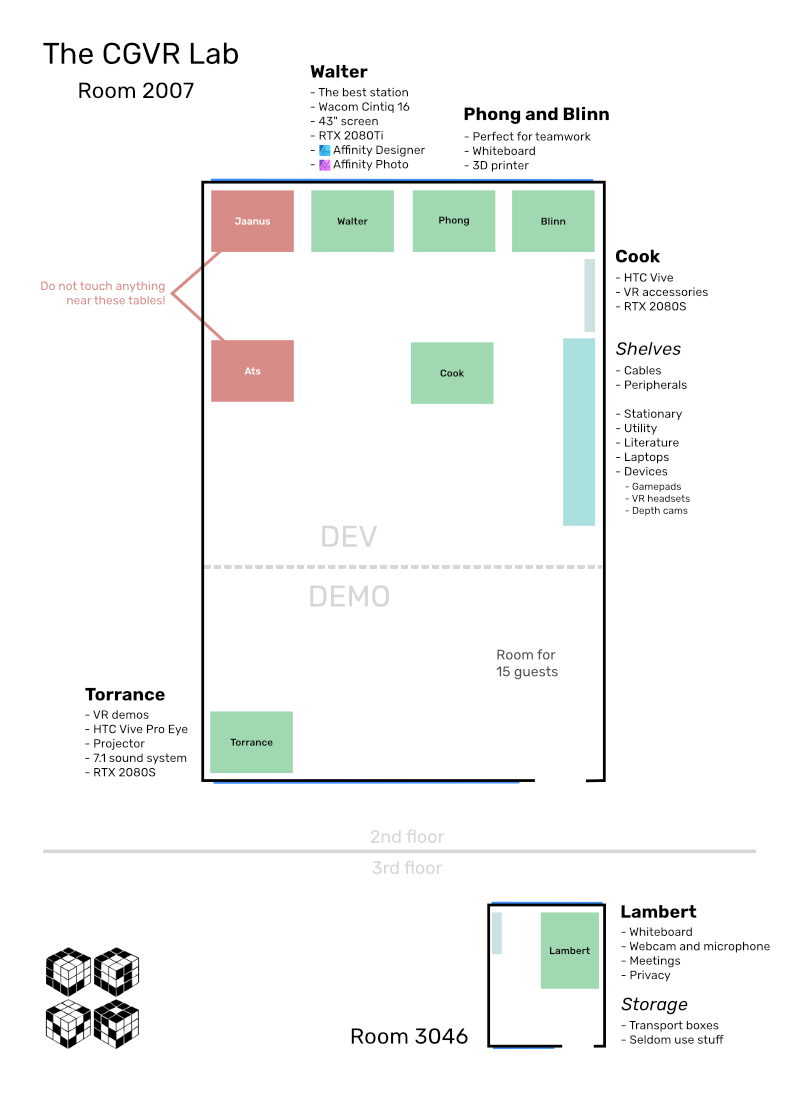
- To access the building and the lab’s rooms 2006-2007, you need to use the card that a member of the lab staff has given you. That card opens the Delta main doors and the 2006 and 2007 room doors. You use your card to get in.
- To access the lab’s private room 3046, ask for the door key from the Delta admin. Return the key to them when done.
- You have access to the lab rooms 24/7! Just that when you use the lab between 22:00 and 7:30, then please be sure to to tell the Delta admin that you are in there so that they would not alarm it. When you leave during that time, and the lab is left empty, say good night to the admin and tell them to alarm it.
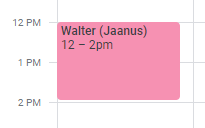
- When you use a part of the lab or specific hardware, then mark it as an event in the Google Calendar. See the example on the right. This is so everyone else knows not to book the same hardware or area of the lab for the same time. Make sure you add the event to the lab’s calendar, not your own personal one.
- Log into the computers with your UT credentials. You should have admin access right away. Let us know if you do not.
- Do not change global settings in the computer without changing them back or leaving a note about it. Unless you are sure what you are doing.
- When you take something from the shelves (a book, headphones, VR devices) then put it back in the same place afterward. This is so that people can always easily find the right stuff they are looking for and so that there would not be arbitrary things on the workstations when the next student comes.
- When using the HTC Vive, remember to turn off the lighthouses via the CGLearn interface when you are done. They have moving parts, which should not be moving when no one is using the Vive. Refer to the Wireless HTC Vive Guide below.
- When borrowing (after the lab staff has marked it in the inventory table) a larger piece of hardware, like bigger boxes, PCs for going to expos etc, then tell the administrator too. Otherwise, they will wonder why someone is carrying stuff away.
- When something runs out (paper, pens, sticky notes, candy) or breaks (a cable, a controller), then notify a member of the staff immediately so that we can restock as quickly as possible.
- If you need some hardware that is currently not available in the lab, then notify the member of the staff. We might be able to get it for the lab if it is justified and has a reasonable cost.
- If you have an emergency, then the phone numbers of the lab staff members are posted on the walls in the lab. When you have a general question, then e-mail the list or ask in our Discord server (invite in the lab’s CGLearn interface).
- Have fun and be productive!
The Plan
Wireless HTC Vive Guide
Using HTC Vive with the Wireless Adapter. Steps to take in order to enjoy the new freedom of movement:
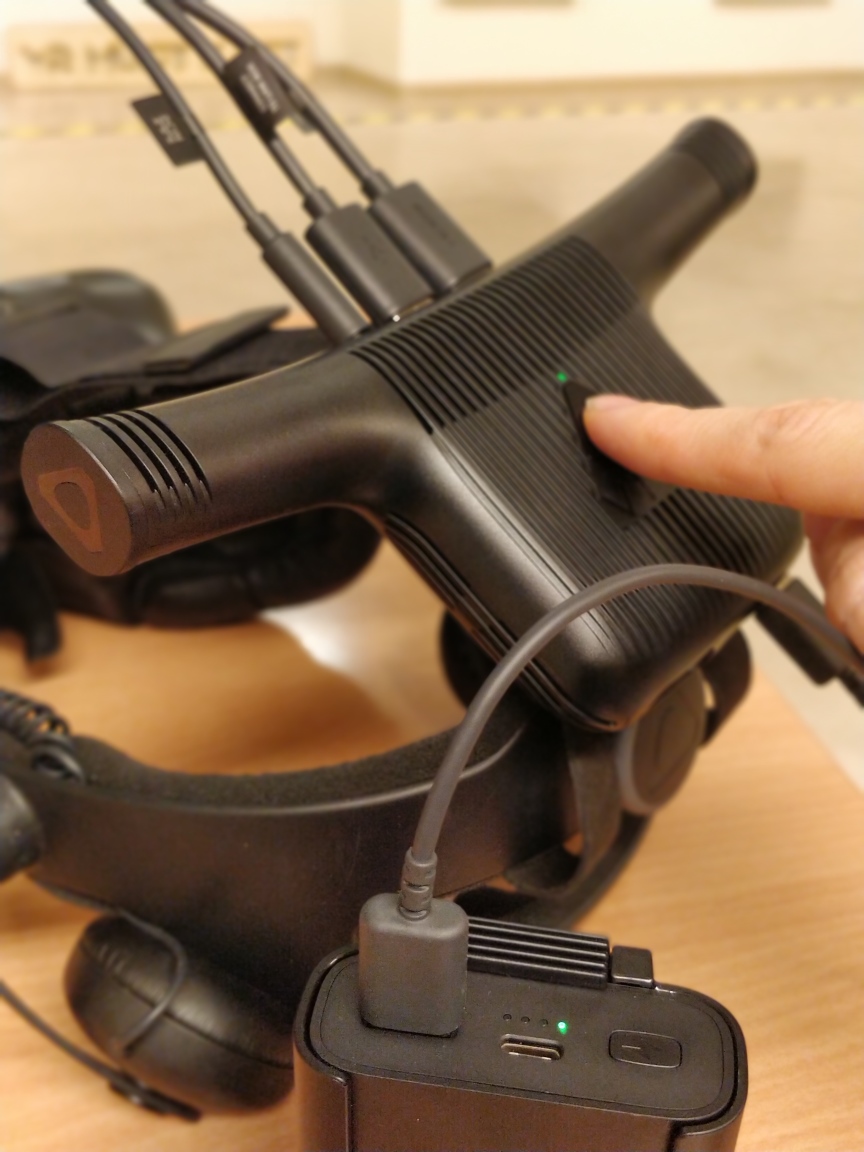
1) Locate the battery pack from the shelves labelled Virtual Reality next to CGVR-Cook. Pray that the battery is full, otherwise charge it through USB-C port with the cable, using one of the USB wall adapters from the motion controllers or a quick charger.
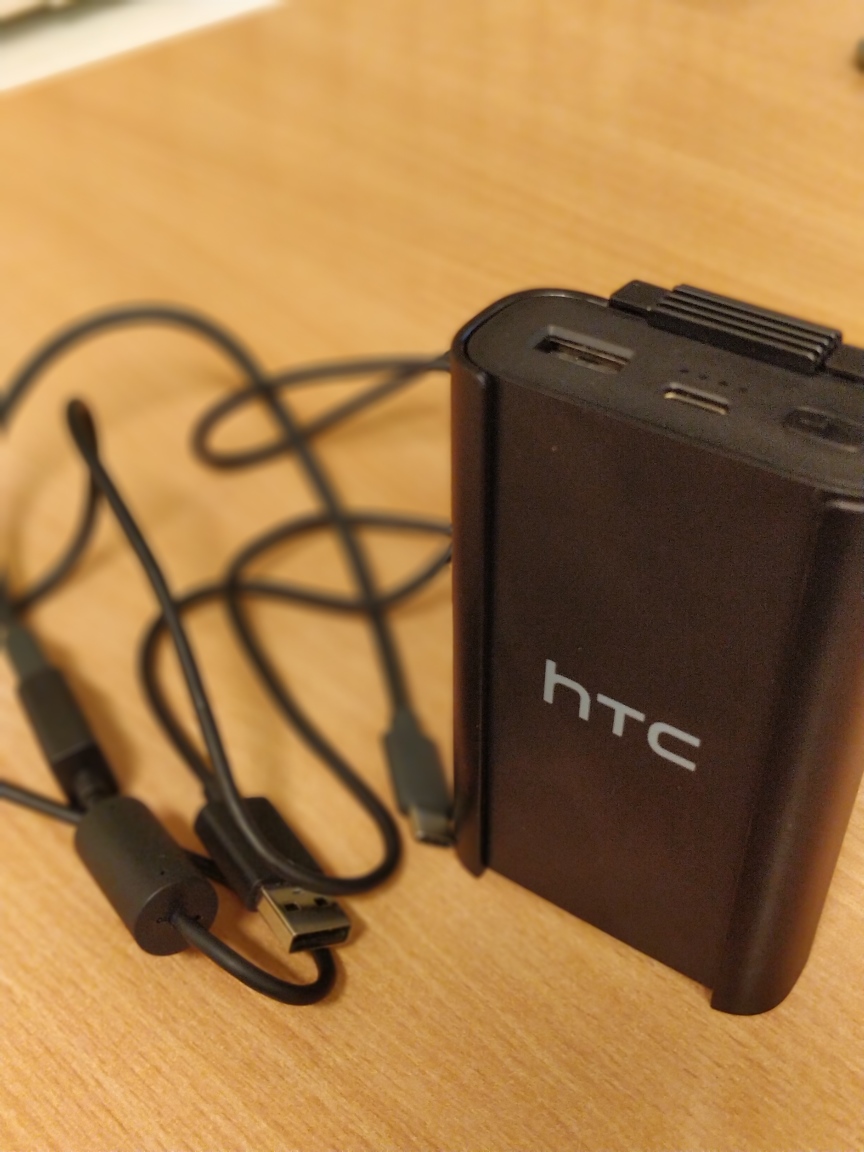
2) Connect the battery to the extra funky looking headset via the long USB cable dangling from the headset. When clicking the power button on the battery, green LED should light up both on the battery and on the wireless receiver (a few seconds later). If the receiver does not light up, click the Vive logo on the receiver (yup, it’s actually a button!)
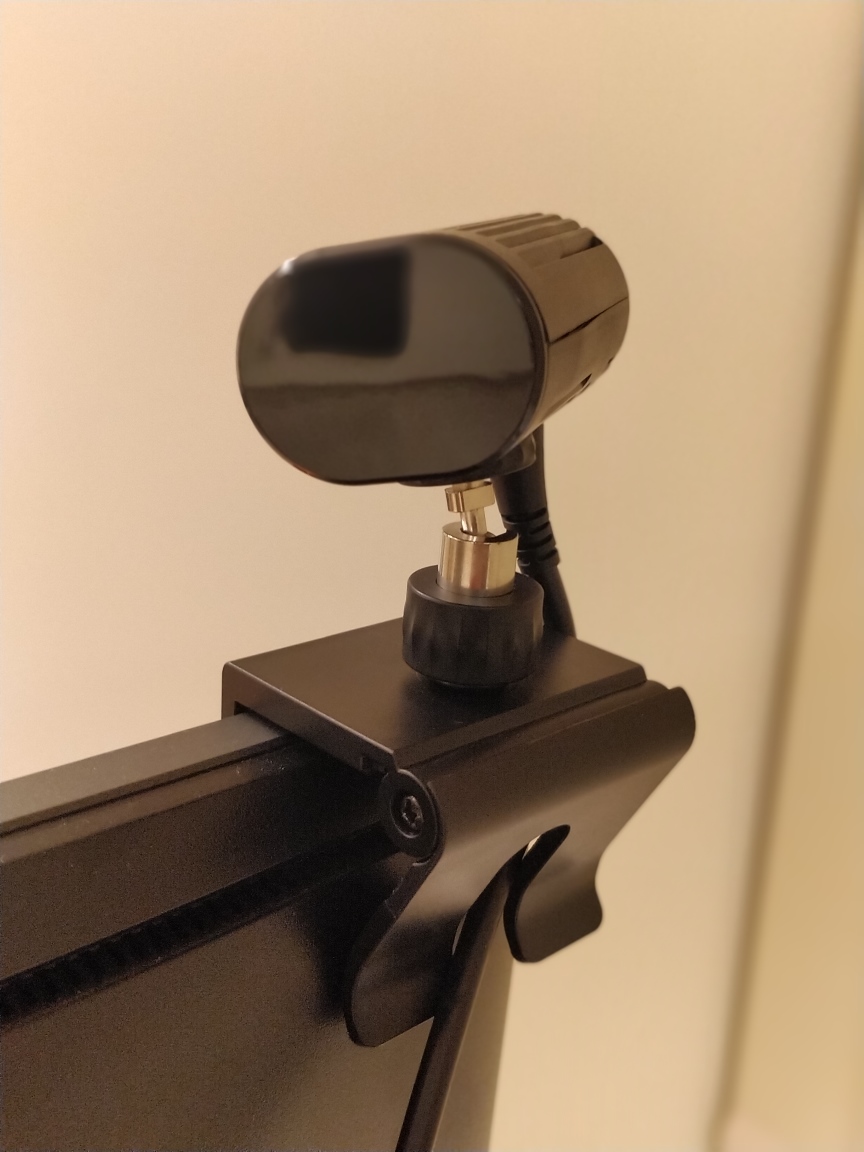
3) But where is the transmitter? There she be, stuck on the monitor! Even though it looks like a directional antenna, actually the signal bounces around the room, so you can easily also wear the headset while sitting behind the desk (as long as at least one lighthouse sees you). No more rolling your chair over the cable, yes! But basically you can forget about the transmitter.
4) Launch VIVE Wireless app from the desktop. If you skip this step, the headset will not be detected later in SteamVR
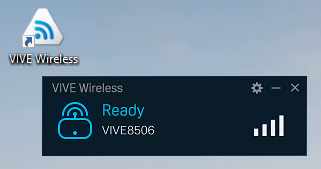
PS! If it doesn’t connect (keeps connecting forever), then press the cog button and pair the headset again. When pairing, you also need to press the Vive logo on the wireless receiver.
5) Launch SteamVR as usual.
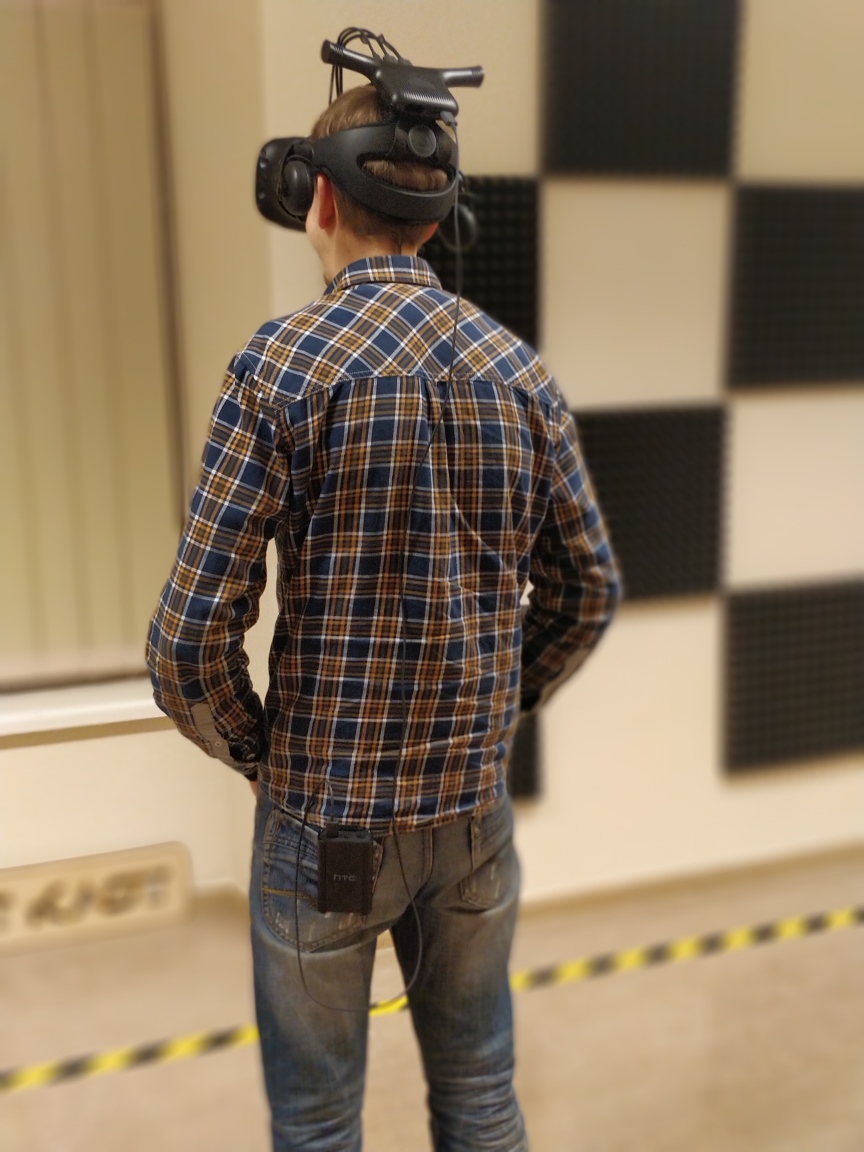
6) Wear the headset and manage the battery pack cable so it doesn’t get in your way (probably best to guide it behind your back and hide the extra cable away too). Clip the battery on the outside of your belt or pocket – inside your pocket it will get very warm very fast! Also try not yo yank the cable that go from the headset to the receiver, however tempting it might look.
7) Get lost in VR, battery life should be 2.5 hours on a full charge.
8) After the session take off both the headset AND the battery. Don’t be this guy (gas pump represents headset):

9) Unplug the battery, leaving the long USB cable attached to the headset. Using the Vive USB adapters, the battery should fully charge in 5 hours (having a USB-C quick charge adapter should reduce this time to around 2 hours)
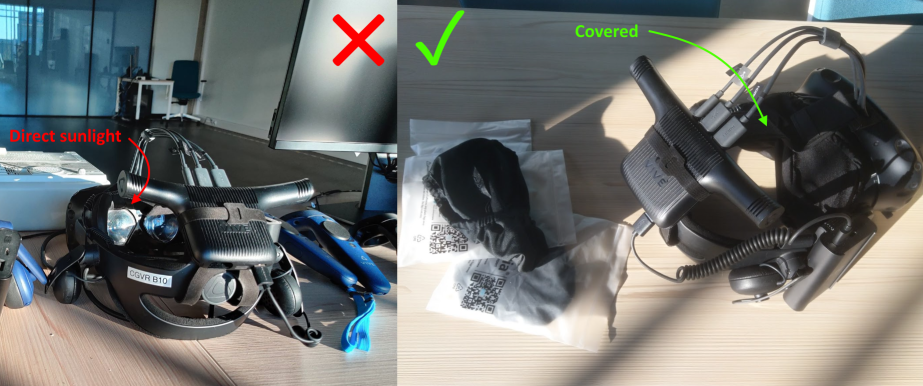
10) Cover the headset. If you are done, put the sunlight protection cover back on the headset. So that when a sunny weather appears, the light would not burn the headset’s display.
11) Go home. But don’t leave the battery charging overnight, just in case.
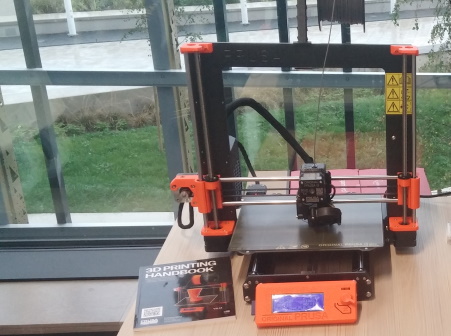
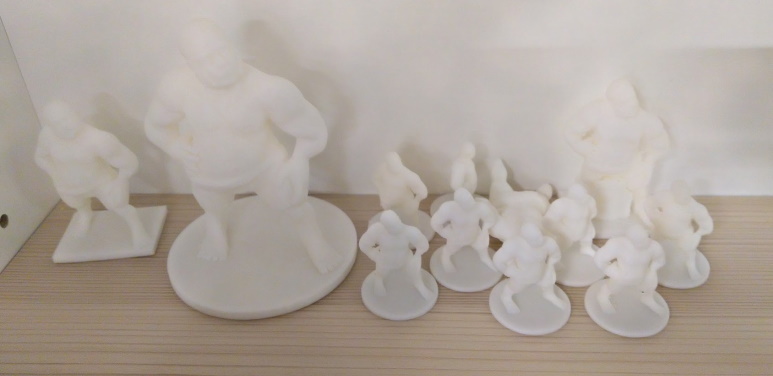
3D Printing Guide
There is a Prusa i3 MK3S 3D printer near the CGVR-Blinn computer. It is best if you ask the member of the lab staff to help you in 3D printing when it is your first time. All staff members have experience with it. Here is the official 3D printing handbook by Prusa.
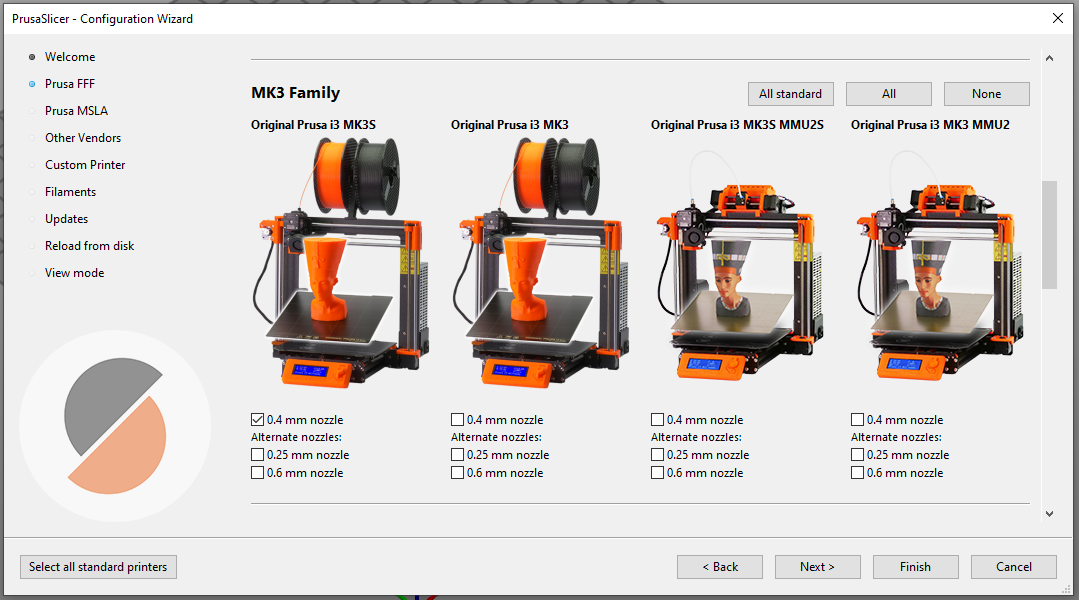
To 3D print you need a slicer that takes your 3D model as stl file that can be exported from Blender and creates a g-code file that the printer can read. The recommended slicer for Prusa printers is the PrusaSlicer which is installed on CGVR-Blinn. Slicer is a program that takes your 3D model and slices it into layers for 3D printing.
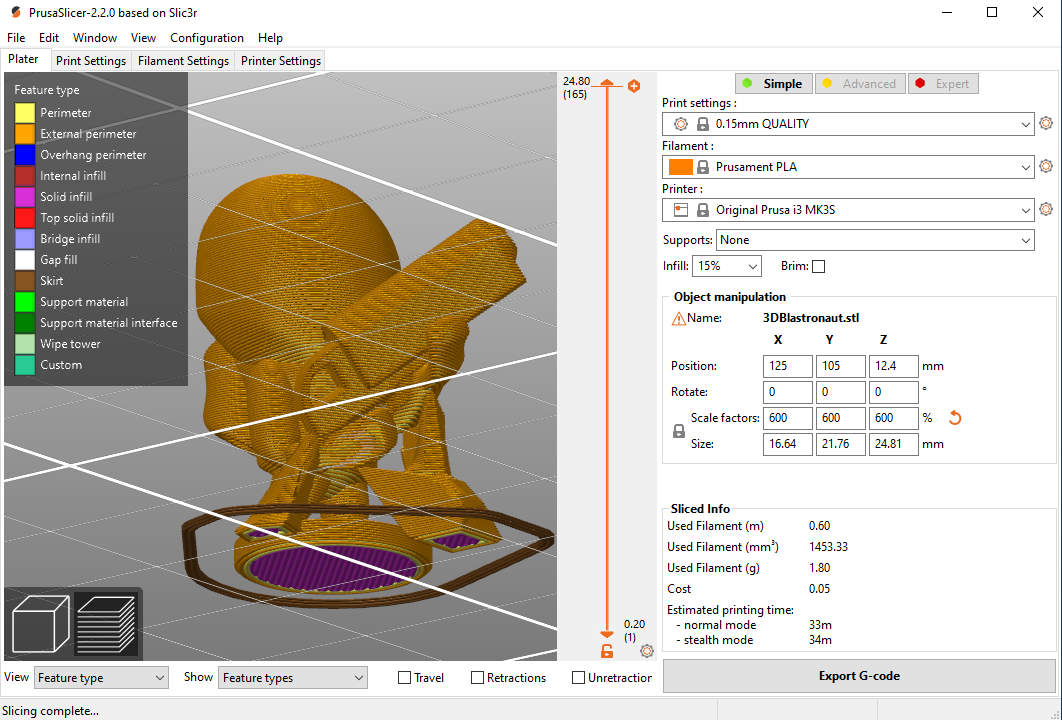
When you first install the PrusaSlicer, choose the correct printer which is in this case Original Prusa i3 MK3S as shown below:
Then Drag and drop your stl file to the slicer. Make sure that your print settings correspond to the filament type that you are using. In CGVR lab we have both ABS and PLA filaments, in the following picture PLA filament is used. Different filaments have different printing temperatures and this information is written in the g-code file.
You can also change the object scale, rotation and position and layer height (0.15mm QUALITY) from here.
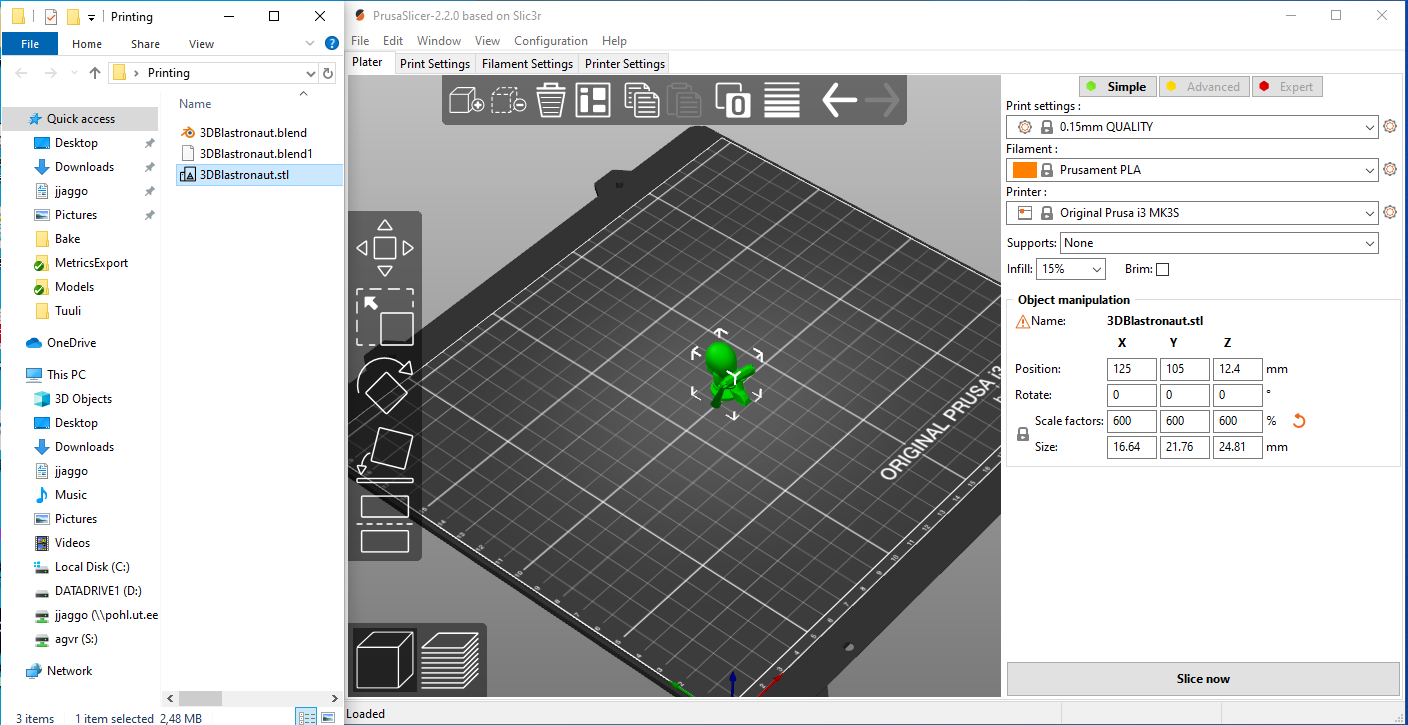
Once you are happy with the settings you should press Slice now. (Don’t worry, you can tweak the settings later and slice it again if anything is wrong). Rotate your model with left mouse button and observe it from below. Make sure that there are no overhangs (marked with blue color), to fix them you can add supports in modeling software or auto generate them in Prusa slicer.
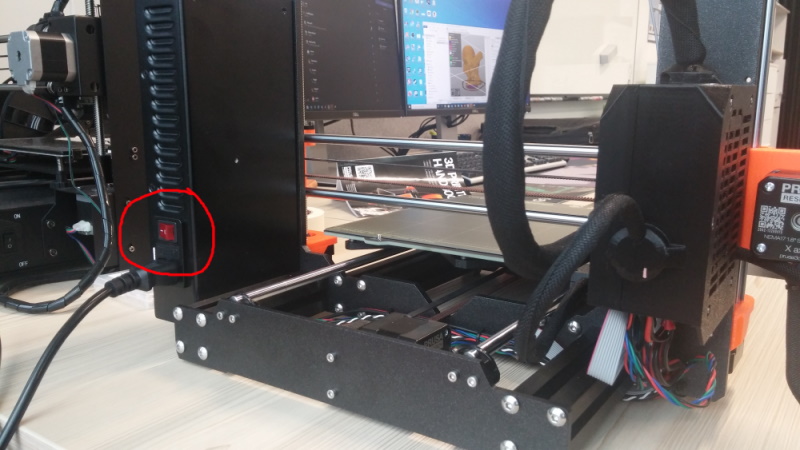
Once you are happy with the slicing, click Export G-code and save it to the flash card (Blinn and Phong have a card reader on their top panel).
And turn on the printer (The red button on the back of the power supply).
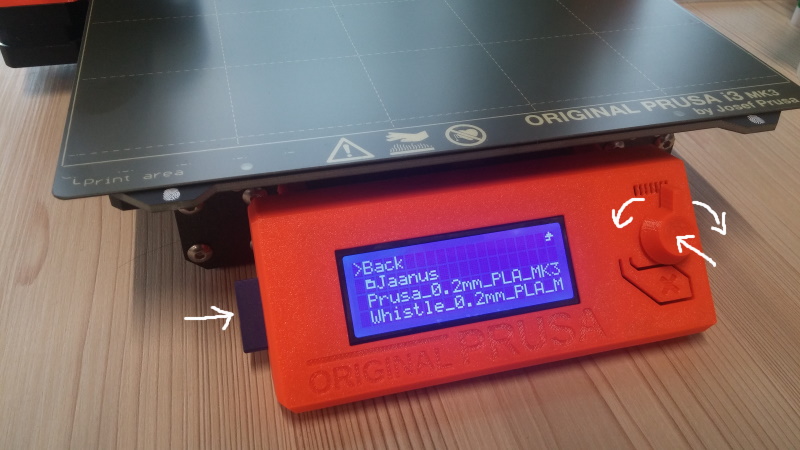
After that insert the SD card to the printer and choose the print file from the folder. Rotate the knob to navigate and press it to select.
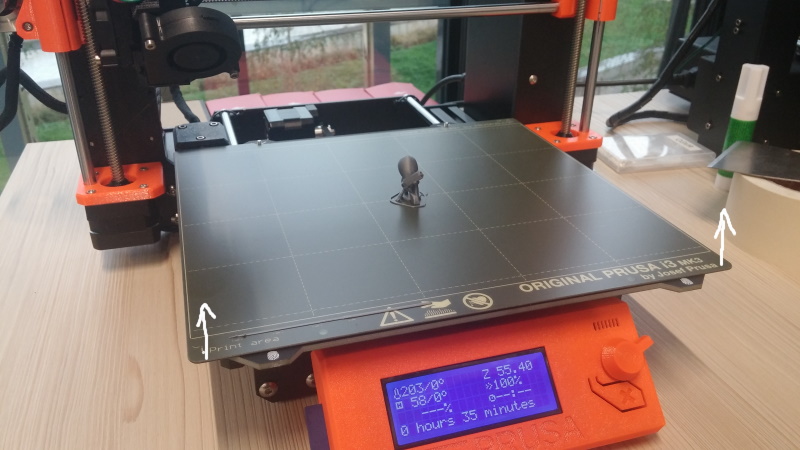
After selecting the file, the printer will automatically begin the heating process which might take for a few minutes. It can also squize out some filament from the nozzle, don’t worry about that, the printer will clean itself when it starts. Once the print is ready, pull the top surface off the heatbed (it is attached with a strong magnet) and gently bend the panel or pull the printed piece away. Don’t use sharp tools that might scratch the slippery surface.
Once finished clean the metal plate from any other pieces that might have stuck to that, you can use isopropyl alcohol to also wipe it and place it back to the heatbed. When you are done for the day, turn of the printer again.
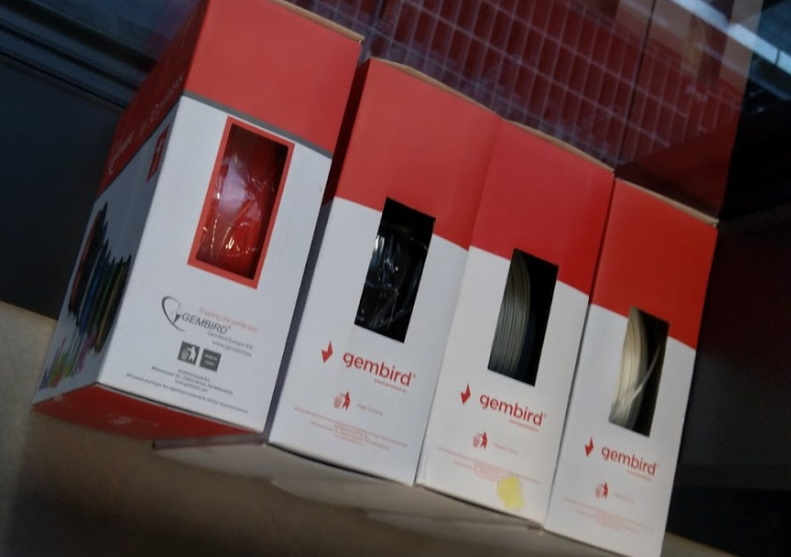
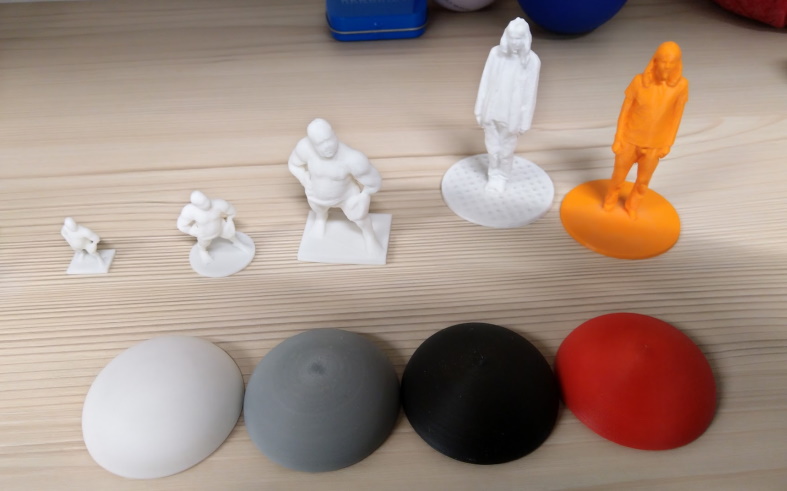
The common filaments for 3D printing are PLA and ABS. The latter is stronger and dissolves in acetone. This allows you to do things like acetone vapor smoothing for a smooth finish. We have available 4 rolls of ABS filament in white, gray, black and red. And also a one roll of Prusa gray PLA, check the labels on the package.
If can happen that after printing a few layers the whole object comes loose. This is also affected by the temperature of the hotbed and extruder. When this happens, cancel the print and try again differently.
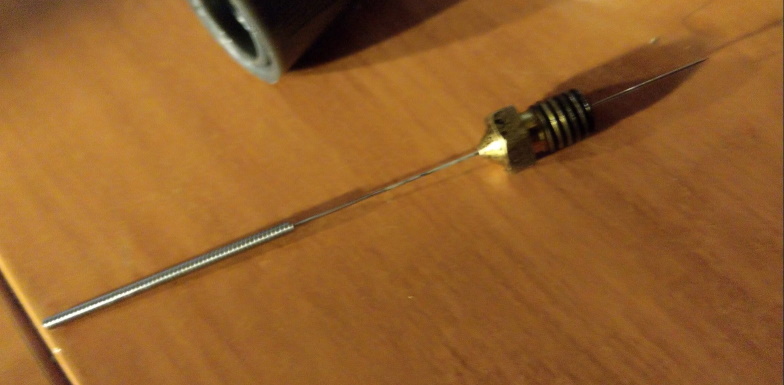
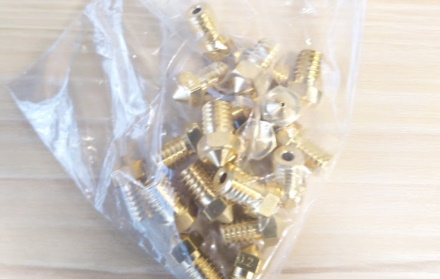
One problem that could happen is a nozzle jam. This means that the brass nozzle in the end of the extruder gets jammed with burned in filament or dust. If that happens, there is a number of extra nozzles and tools to clean the jammed nozzle. Soaking the nozzle in acetone also helps. The default nozzle inner diameter is 0.4 mm. The diameter is written on the specific nozzle.
No worries if you don’t get it on the first try!
It is also useful to first try with a smaller objects first if you are unsure your print will work
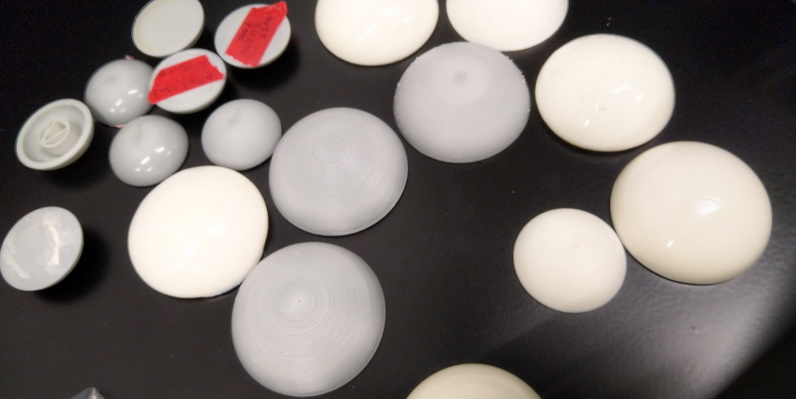
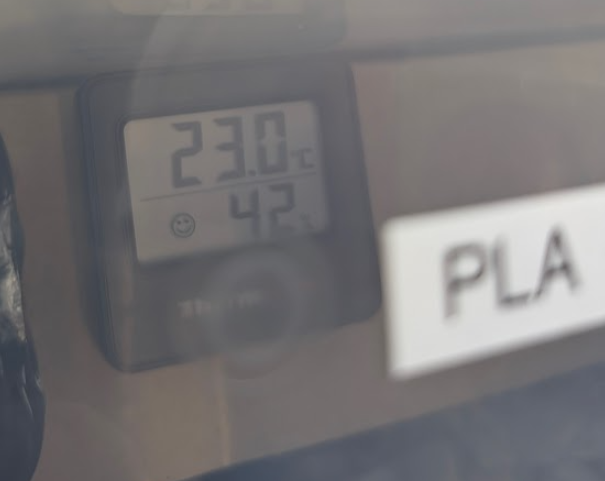
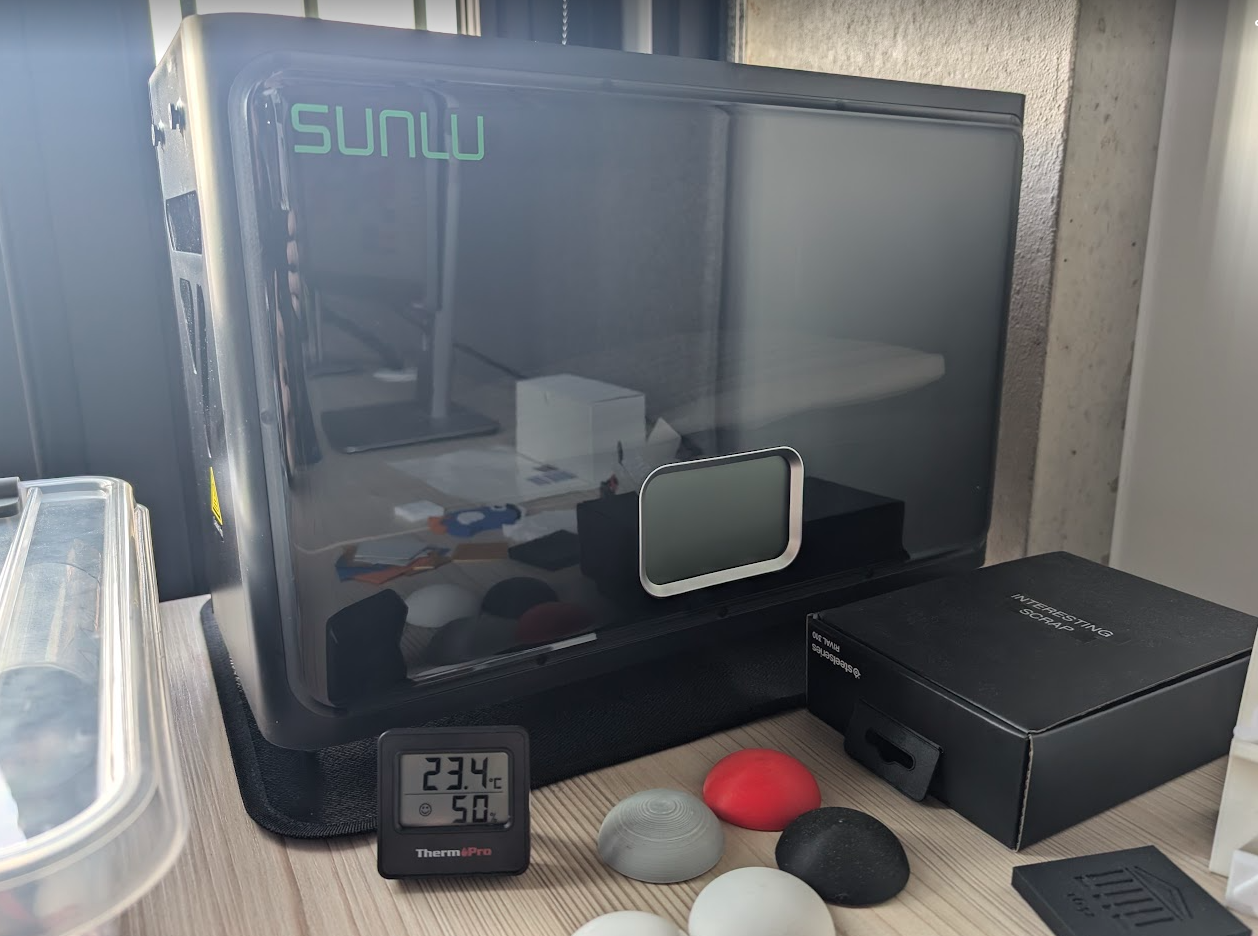
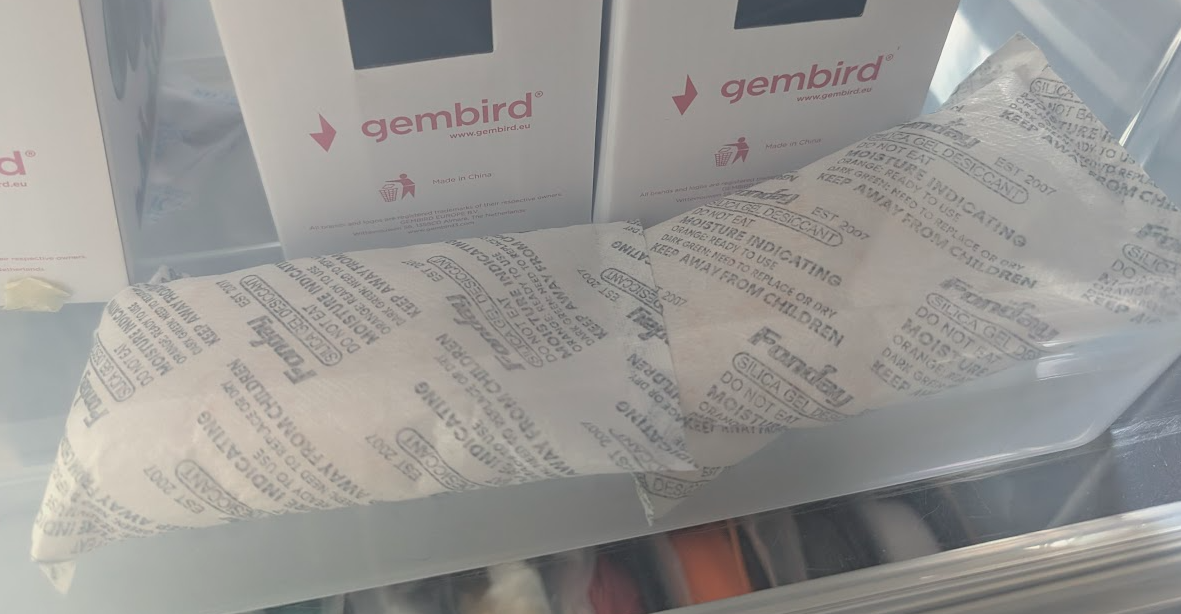
The best storage humidity for PLA and ABS should be about 30-50%. Look at the hygrometers inside the storage boxes. If the filament seems too moist (stringy, crackling when printing, leaves holes in the print), then use the filament dryer to dry the filament first. You can also look if the desiccant bags inside the boxes have turned from orange to green. If so, they need to be dried (recharged) in an oven, microwave, or sunlight until they turn orange again.
|

|
|
|
|
|
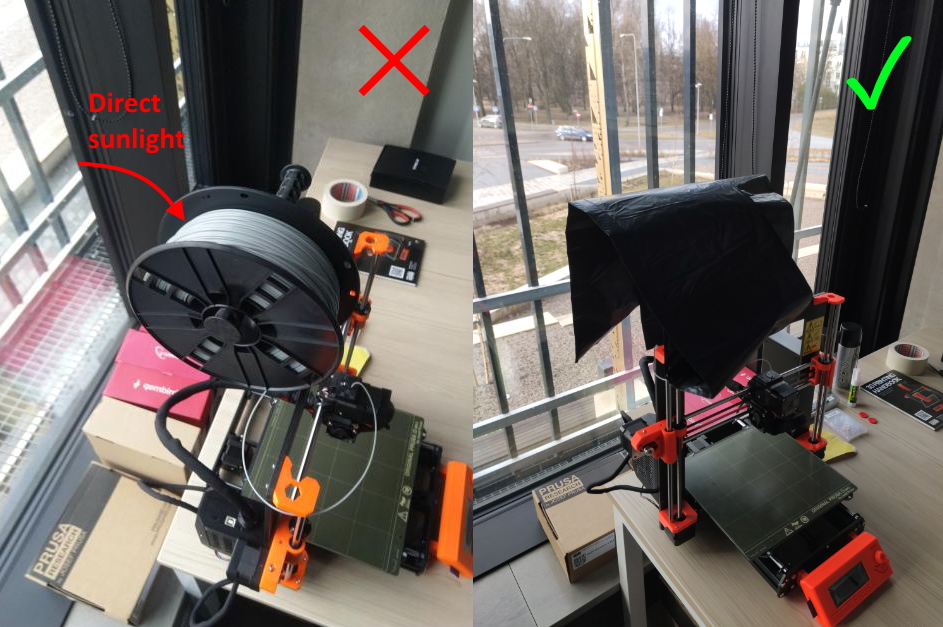
When you are done, be sure to cover up the filament as it should not be exposed to direct sunlight for prolonged periods of time.
Good luck and have fun in 3D printing!
Games Guide
For you to get experience with innovative games or just for recreational use, we have an experimental Steam PC Cafe Server set up and have bought some commercial licenses of Steam games. The PC Cafe Server allows for lending out of the licenses. The number of seats is the number of concurrent users that can play that game.
Note that the PC Cafe program restricts the use to the university premises (including dormitories). However, there are situations like science or educational events, where there likely will not be an issue. It is also impossible for us to check or control from where are you connected to the server. Note that in the lab’s stationary PC-s everything is already set up by default and you should not have to worry about it at all.
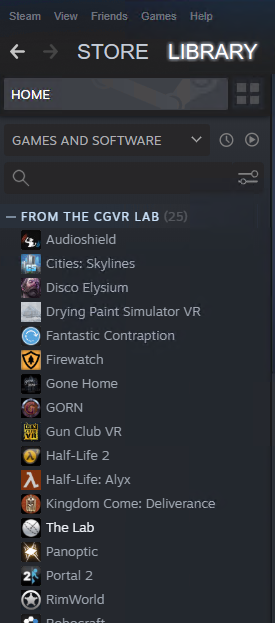
The games should be automatically available on Steam with any Steam account logged in.
When you log into the lab PC-s, you should see a green VPN connection icon like this:
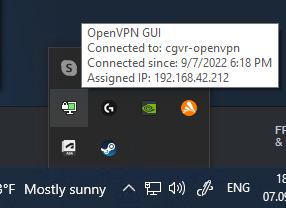
This is automatically configured to connect whenever a lab student logs into the PC.
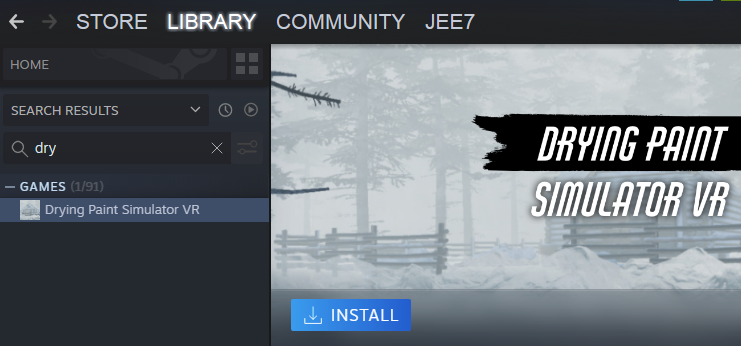
You can then log into Steam with your own account (or use the lab’s account if you want to), and Steam should show you access to the games:
If this is not happening, please tell us. Otherwise everything should be good for you to play!
—
However, if you need to set it up on your own computer and love a technical challenge, read on.
The overall topology and user flow looks like this:
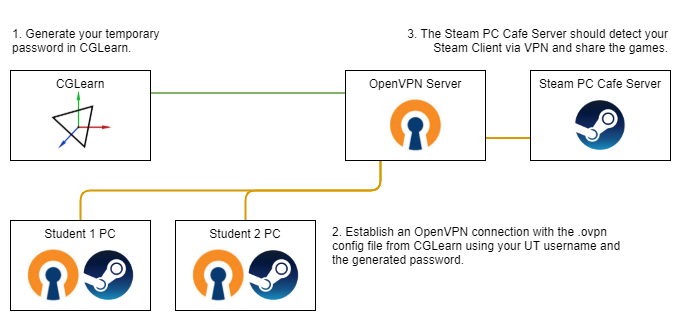
To lend the license from the PC Cafe Server, you need to connect to our VPN via the OpenVPN Community Edition. As the PC Cafe Server uses UDP broadcast to detect the Steam Clients, the VPN connection needs to work on TAP (bridge) mode. This in effect creates an OSI layer 2 virtual LAN between you and our PC Steam Cafe server.
When installing OpenVPN the default installation settings are OK.
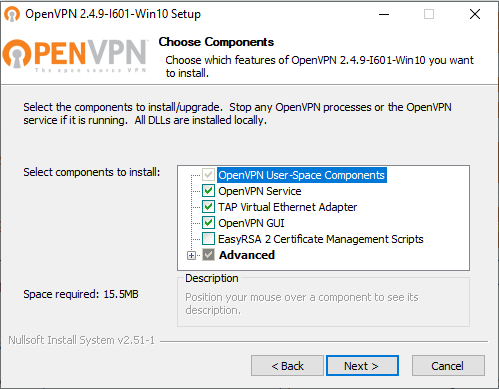
During the installation process OpenVPN should create you a virtual TAP-Windows Adapter V9. This will be used as the network adapter for the VPN.
For authentication you need to create yourself a temporary password from the CGVR Lab page in CGLearn. From there you can also find the configuration file, which you need to use in the OpenVPN Community Edition to connect with your UT username and the temporary password.
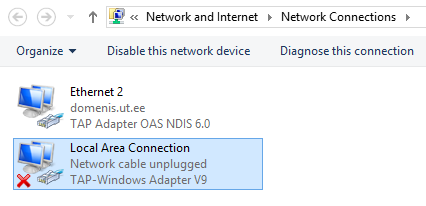
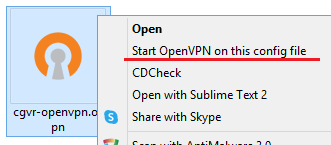
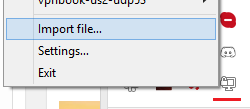
You can use the configuration file either via the context menu or by using the Import Configuration button in the OpenVPN GUI. Note that the OpenVPN icon can look very similar to your network connections icon.
 |
 |
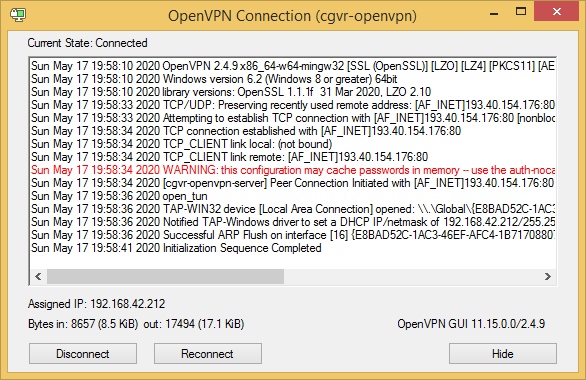
When you connect with the given configuration file and enter the correct authentication, you should see the Initialization Sequence Completed message in either the console or status window of OpenVPN.
At that point wait for about 15 seconds and then you should see the available games in your Steam client. You can log into Steam with any user account. Try to search for some of our purchased games and see if they have the Install button available.
Note that this setup is experimental and it might not work all the time or be somewhat unstable. If you have an issue, please contact the lab staff.
For the lab PC-s the VPN connection should be set up by default. If that does not automatically work on a lab PC, then let us know and use the temporary password option described above.
When trying out the games, think about what makes them interesting and how could you make such game design, mechanic’s implementation or graphical effects.
Remote Desktop Guide
You can log into the lab computers, when they are online via remote desktop. For this you need to be on the UT VPN. THIS IS NOT the same VPN used for accessing the Games in the Games Guide. It also uses OpenVPN Connect (which is not the Community Edition used before). You can follow this guide: https://wiki.ut.ee/pages/viewpage.action?pageId=17105602
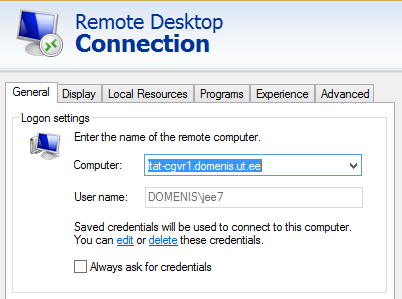
When you have connected to the tunnel.ut.ee VPN, then you can use the Windows’ Remote Desktop tool to access any turned on lab PC. Just find the Remote Desktop Connection tool on Windows:
![]()
Then see below for the computer names and use the username DOMENIS\YourUtUsername with your UT password.
| PC Name | Address |
|---|---|
| CGVR-Blinn | ltat-cgvr5.domenis.ut.ee |
| CGVR-Phong | ltat-cgvr6.domenis.ut.ee |
| CGVR-Lambert | ltat-cgvr7.domenis.ut.ee |
| CGVR-Walter | ltat-cgvr4.domenis.ut.ee |
| CGVR-Torrance | ltat-cgvr8.domenis.ut.ee |
| CGVR-Cook | ltat-cgvr9.domenis.ut.ee |
The current status (turned on/off?) for each PC is shown on the lab’s page in CGLearn near the Vive lighthouses admin. So if a PC does not answer, perhaps check from the lab page if it is turned on or not.
Network Drive Guide
Members of the lab have access to potentially petabytes of storage space on a networked drive. This drive will be attached automatically on all the computers, where you log into with your UT username and password. For example, the lab PCs and the PCs in all the computer labs, auditoriums, etc. As long as you are a member of the lab, the drive will automatically appear under Network locations and has the name agvr.

You can also attach this drive to your own computer and access it from anywhere.
To attach the drive, use the address: \\export.hpc.ut.ee\AGVR.
When it asks for the username and password, use DOMENIS\[your-UT-username] and your UT password.
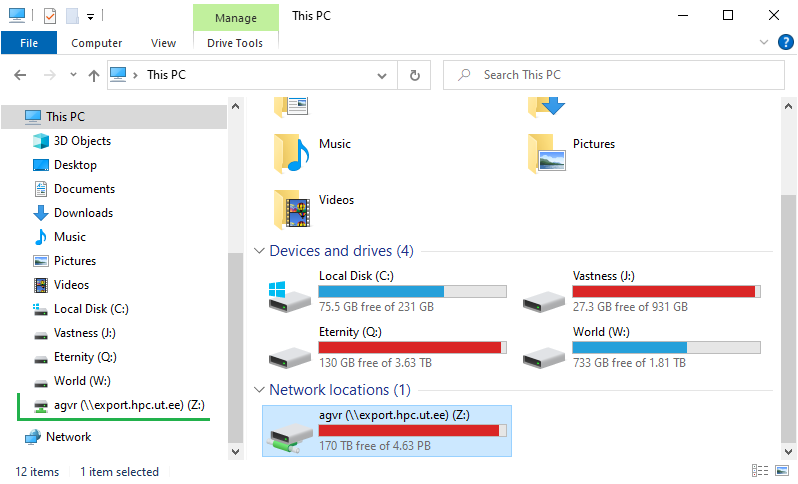
To store files on the drive, you should make a new folder there with your name. Note that all the files there will be accessible by other lab members too. So, do not store confidential files there. However, the drive is very useful for storing large files like raw video footage, or files you need to be able to access quickly from multiple computers like presentation slides, practice session codes, homework files, etc.
Microphone Guide
In room 3046 we a Mackie EM-91C microphone attached to a Focusrite Scarlett 2i2 audio interface. This is connected to the Lambert computer and allows you to both record your voice and even a musical instrument.
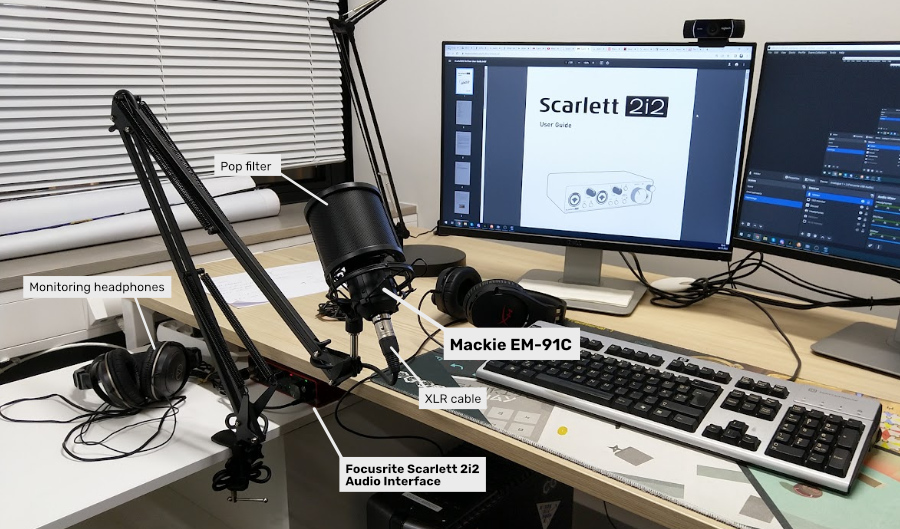
The microphone’s boom arm (stand) is fastened to the secondary table, so taps on the main table or the keyboard will not travel to the microphone. The microphone itself is inside the shock mount attached to the boom arm. This should soften all sorts of different taps and vibrations. In front of the microphone is the pop filter, which softens the noise caused by fast moving air, usually occurring with aspirated consonants (p, k, etc, Estonian: helitu sulghäälik).
The Scarlett 2i2 audio interface has two input ports. Both can take either a regular 6.35mm audio jack, or an XLR jack. The microphone is connected with the XLR cable to the first port. On top of each port there are the gain dials. Under the port there are two buttons. The INST button switches the 6.35mm audio jack port to 1.5MΩ impedance, which is required for specific instruments like guitars. The AIR button switches on a built-in audio enhancement circuitry, which boosts the mid-high frequencies.
The Mackie microphone uses phanom power, so to switch it on, you need to press the 48V button. This causes the XLR cable also to transfer power to the microphone and power the microphone’s own circuitry.
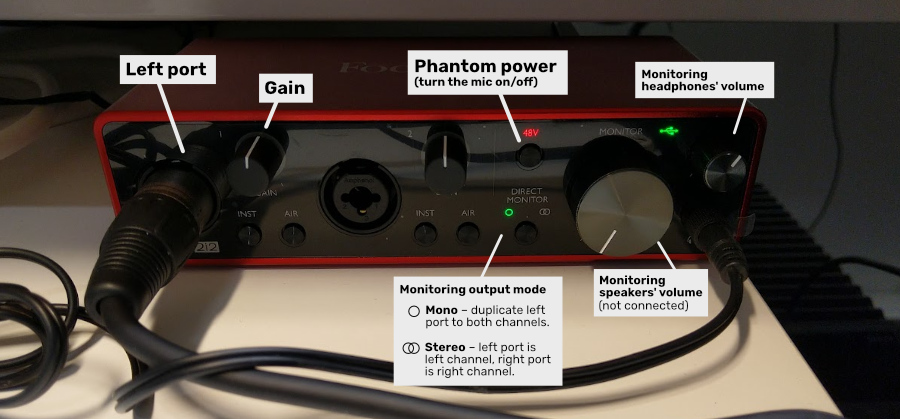
On the right side there are monitoring controls. Monitoring outputs the input audio directly, so there will be little to no latency. The big dial is for the volume of speakers that can be connected to the back side of the interface. None are currently connected, so that dial does nothing. The small dial controls the volume of the connected headphones. There is also the mono/stereo button. The Mackie is a mono microphone. By default, the left port input goes to the left channel, and the right port input goes to the right channel. So, if your monitoring mode is stereo, you will only hear our microphone in the left headphone. Switching to mono duplicates the left port input to both channels. This is also why the microphone is in the left port. You can use the monitoring headphones for debugging or, if the 2i2 is set as the output audio device for Lambert, also for listening to the audio from the PC.
 |
 |
| Regular headphones | Through Scarlett 2i2 |
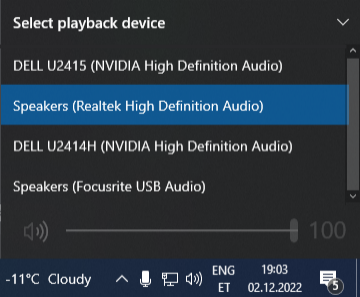
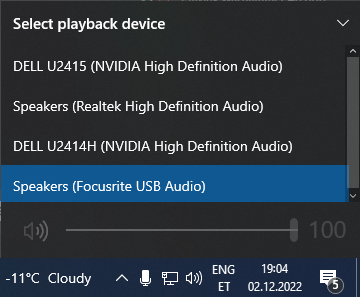
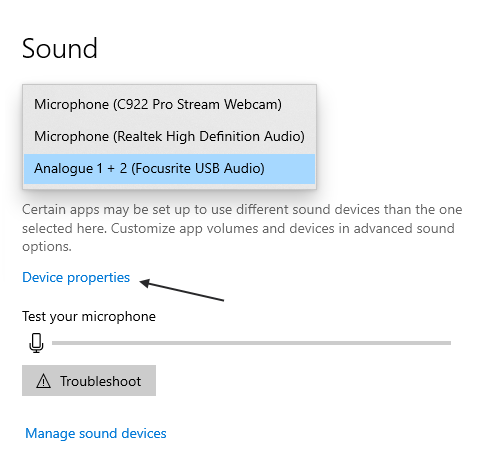
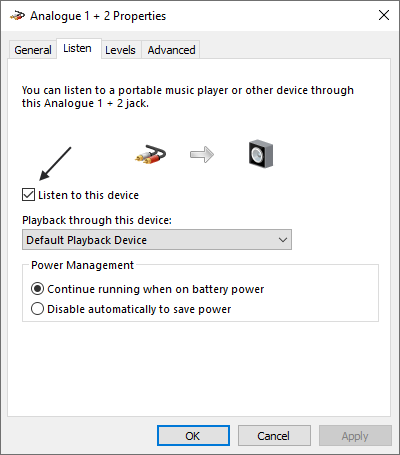
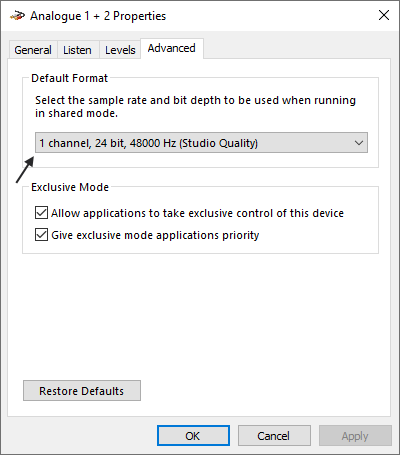
On the PC there a similar setup. To listen to the incoming audio, albeit with a larger latency, you can open the input device’s properties, and choose Listen this device. The audio device is named “Analogue 1 + 2 (Focusrite USB Audio)” by default.
Just like on the Scarlett 2i2, by default here we also have the left port’s input in the left channel and right port’s input in the right channel. To listen to the mono microphone connected to the left port in both channels, we need to set the audio input to 1 channel. This will duplicate the left channel to the right headphone as well.
As for the microphone itself, it has a mesh with a cardoid pattern. This means that it picks up sound coming from the front of the microphone the best. So, make sure the front side (marked by a small cardoid plot image and the Mackie logo, directly under the pop filter) is facing towards your face. Do not speak to the top or side of the microphone, as your voice will be significantly less picked up from these directions. Also, keep in mind that, differently from headset microphones, this one very much picks up keyboard strokes or other significant noises in the room.
Here is how it sounds:
You can try different configurations and use your own musical instrument or another microphone in the right port. Just remember to put everything back afterwards and turn off the 48V phantom power for the microphone if are done using it.
Happy recording!

